Site to Site VPN Configuration in SonicWall Router:

 Site to Site VPN Configuration in SonicWall Router:

Setting up a site-to-site VPN on a SonicWall router involves several steps. Keep in mind that the specific steps may vary based on the model and firmware version of your SonicWall router. Here's a general guide:

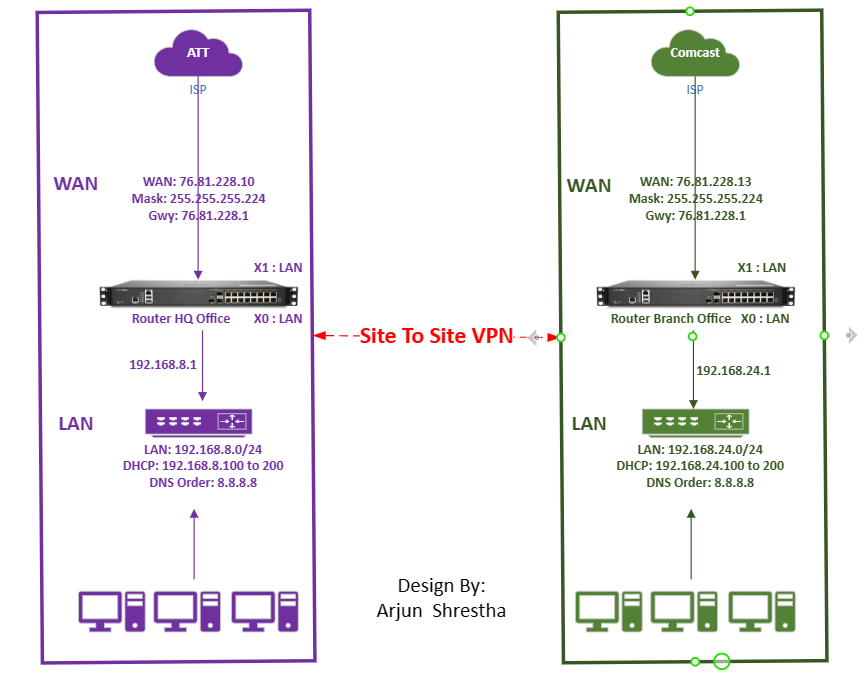
  • We are going do site to site VPN in two group 

    • Group 8 and Group 24  (left side is Group 8 and Right side is Group 24

    • See in the below diagram.

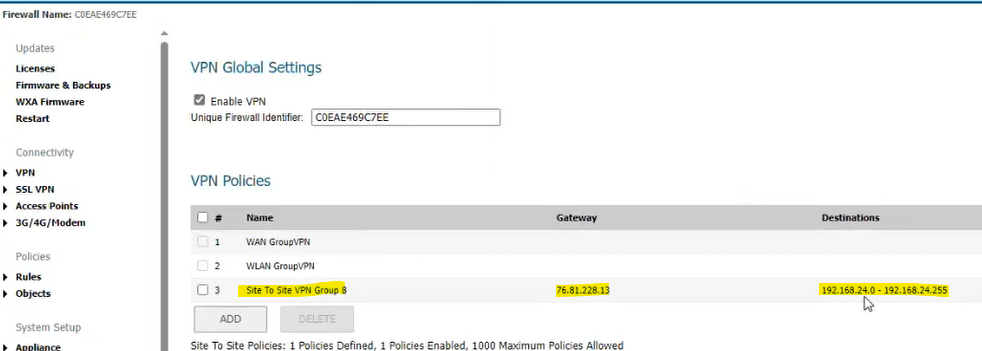
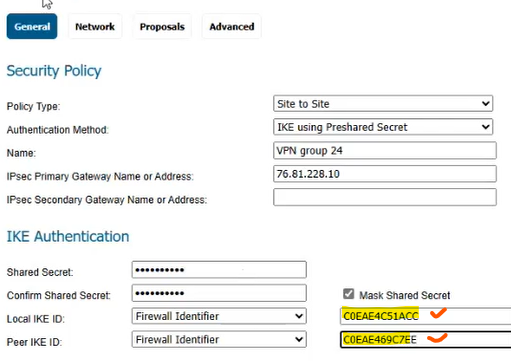
  1. Access the SonicWall Management Interface:

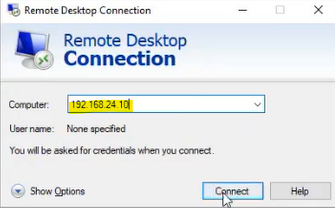
    • Open a web browser and enter the IP address of your SonicWall router.

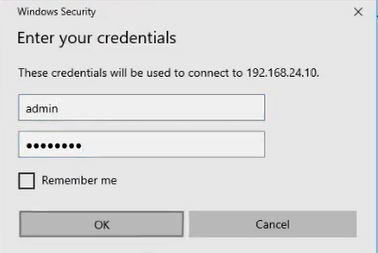
    • Log in with your administrator credentials.

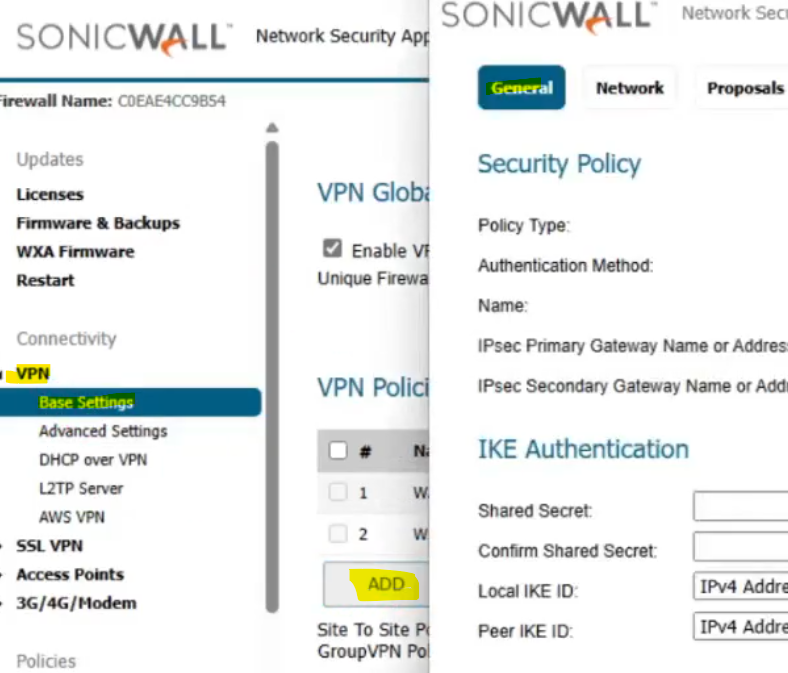
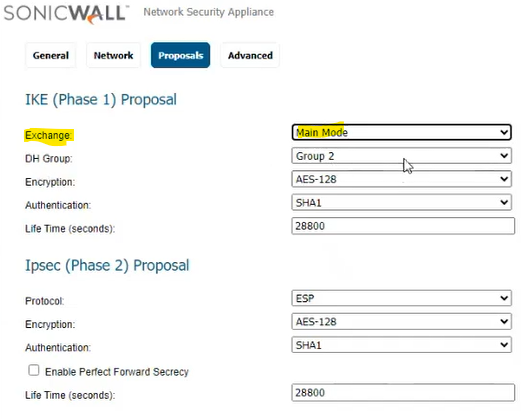
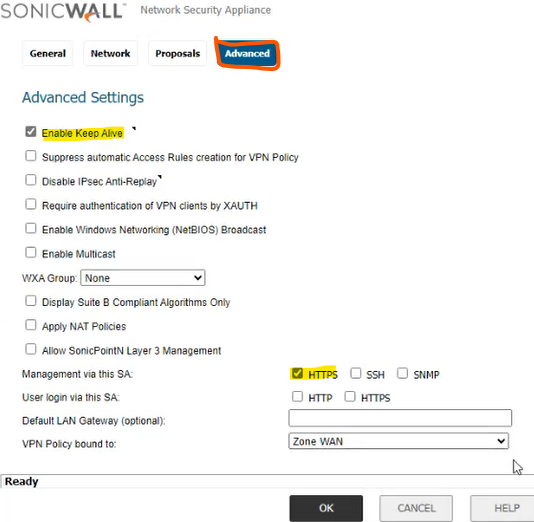
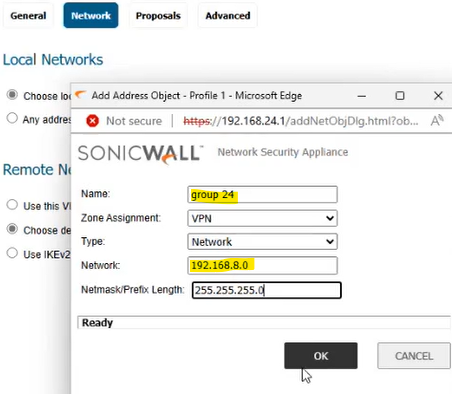
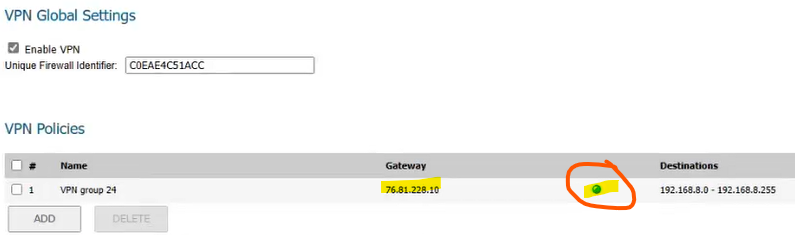
  2. Navigate to VPN Settings:

    • Locate the VPN settings in the management interface. This is typically found in the "VPN" section.


  • Click on Manage 

  • Click on VPN ( under connectivity) > 

    • Click on Basic settings

  • Now click on Add button

Group 8 SonicWall Router configuration:

  1. Configure General tab

    • Provide Security Policy:

    • Policy Type:

    • Authentication Method

    • Name:

    • IPsec Primary Gateway Name or IP Address of 

In IKE Authentication:

  • Shared secret: 1234567890

  • Confirm shared secret : same

  • Local IKE ID: Group 8 

  • Peer IKE ID: Group 24 


4. Network tab

     Local Networks:

  • Choose local network from list:

    • LAN Subnets

           Remote Networks:

  • Choose destination network from list: create new address object.

(Note: in Network field — Type Group 8 IP Network 192.168.24.0 and mask: 255.255.255.0 )


5. Proposals Tab:

  • Only change

    • Exchange = Main mode

6. In Advanced tab:

  • Checked on : enable keep Alive

  • And checked on: HTTPS 

  • Click on the OK button.


7. You can see the VPN policies name:

Note: Now from Group 24(other group), we will repeat same Steps from step 3 to 6


Group 24 side SonicWall Router configuration:

  1. Configure General tab

    • Provide Security Policy:

    • Policy Type:

    • Authentication Method

    • Name:

    • IPsec Primary Gateway Name or IP Address of 

In IKE Authentication:

  • Shared secret: 1234567890

  • Confirm shared secret : same

  • Local IKE ID: Group 24 

  • Peer IKE ID: Group 8 


4. Network tab

     Local Networks:

  • Choose local network from list:

    • LAN Subnets

           Remote Networks:

  • Choose destination network from list: create new address object.

(Note: in Network field — Type Group 8 IP Network 192.168.8.0 and mask: 255.255.255.0 )


5. Proposals Tab:

  • Only change

    • Exchange = Main mode

6. In Advanced tab:

  • Checked on : enable keep Alive

  • And checked on: HTTPS 

  • Click on the OK button.


7. You can see the VPN policies name: with GREEN light. (group 24 side)

8. You can see  Group 8 side also GREEN light


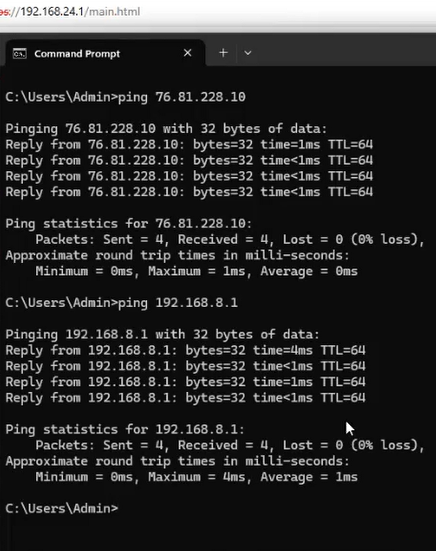
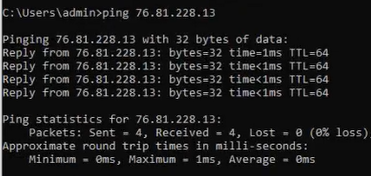
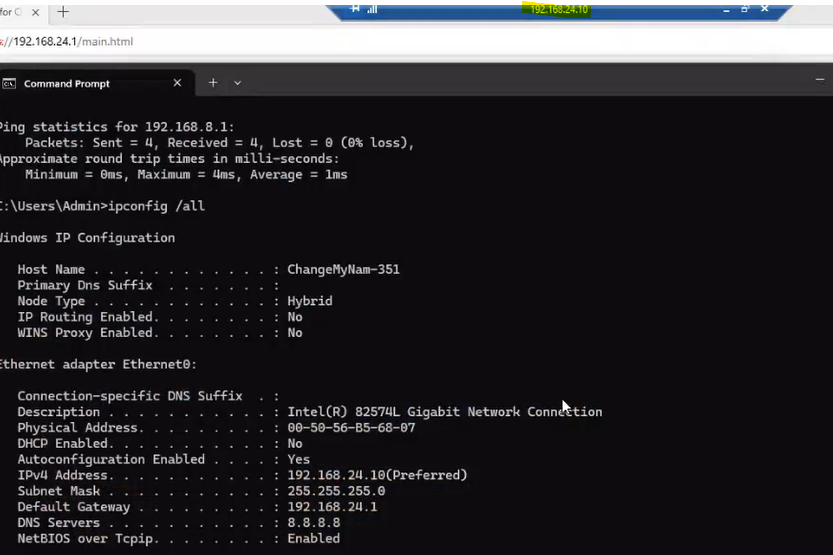
  1. Now you can Ping from both side (Group 8 and Group 24 sides)


Group 24 side: pinging to group 8 (succussed)

Group 24 side: pinging to group 24 (succussed)

If you want to test to RDP you can do that, I mean, now you can able to RDP both sides computer like below:


Group 24 PC IP is using for RDP


Comments

Popular posts from this blog

To increase the attachment file size limit in Exchange Server 2019

How to Schedule back up, backup once, and restore or recover the backup?

Common Exchange Online server issues and solutions